Lowbrow Customs WX Gas Tanks were influenced by the MoCo's WR factory race bike gas tanks. The beauty of the Lowbrow WX Gas Tanks are that with the included, innovative rear mount they will bolt right up to your stock Big Twin frame 1936 - 1984. Get a custom, narrowed look with a tight gap between the tanks, no fabrication required, these are the perfect tanks for a custom Shovelhead or Panhead. WX Gas Tanks have a capacity of 2.25 gallons and feature both a vent and fuel crossover and accept a 22mm petcock, and accept standard cam-style gas caps.
Tools Needed for this job.
3/8 drive ratchet
1/2 inch socket
Extend long flat head screwdriver
1/2 inch wrench
5/16 Allen or Allen Socket
9/16 wrench
Side cutters
Step 1 - Bolt the rear T-mount to your frame using 9/16 in wrench or socket. Shim between frame tabs with washers as necessary. Do NOT fully tighten yet. (Note: Make sure the T-mount back is pointed up not down)
Step 2 - Insert bolt through top front tab and into cast lug on frame backbone to hold one side of WX Tank in place.
Step 3 - Attach 1/4” inside diameter fuel line to crossover fitting on right tank, install hose clamp and fully tighten. Add an additional hose clamp loosely for the other fitting on the left tank. Push the fuel line into place on vent fitting of left tank when installing right tank. Put flat washer and nylock nut on top tank tab bolt and do not fully tighten.
Step 4 - Align the two rear tabs. The tab on the left tank should be behind of the right tank tab. Attach the WX Tanks with the supplied allen head bolt to the rear end of the T-mount using 5/16 allen wrench or socket.
Step 5 - The front lower tabs on the tanks attach to the stock frame tab on either side. Install and fully tighten the bolt and nylock nut. Fully tighten top through bolt and all bolts to rear T-mount.
Step 6 - Use a length of 1/4” inside diameter fuel line and two hose clamps to connect the fuel crossover fittings. Tighten clamps. Also tighten left tank hose clamp on the upper vent crossover line from Step 3.
Notes: Tanks are pressure tested at the factory, but it is highly recommended you or your painter pressure test it again before painting; it's cheap insurance!
For more help watch Todd walk you through this install.
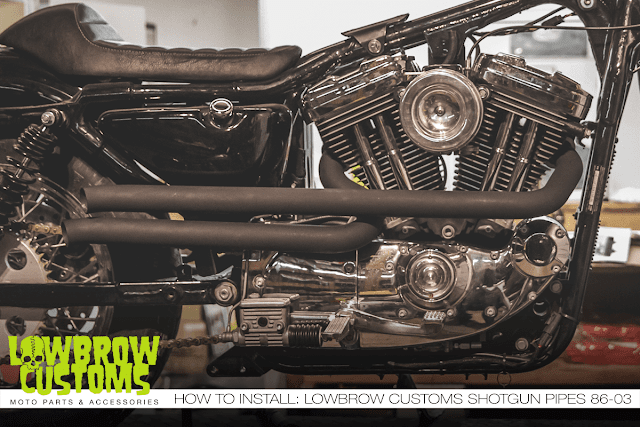
This tech tip will walk you through installing our new Lowbrow Customs Shotgun Pipes for 2004 and up XL models. Whether giving you added ground clearance on a scrambler or tracker, or just for high-and-tight style on a rigid or swingarm Sportster, the Shotgun Exhaust Pipes from Lowbrow Customs make quick work of improving your motorcycle's look and sound. Quick and E-Z bolt-on install with the included heavy-duty mounting brackets and hardware.
Lowbrow Customs Shotgun Pipes come in Chrome or Black.
Included in the package and extra info:
- Mounting brackets in your favorite color, black
- Mounting hardware
- Requires use of your existing stock exhaust flanges
- Compatible with Lowbrow Customs Cast Heat Shields
- Shotgun Exhaust Pipes include 02 sensor bungs to accept your stock 02 sensors, plug and play! Please note that while this exhaust is bolt-on fitment for 2004 - 2006 XLs, these carbureted bikes will need block-off plugs (not-included) for the 02 sensor threaded bungs.
Tools you will need for the job.
3/8 drive Ratchet
Torque wrench
1/4 drive 5/16 socket with 1/4 nut driver for removal of heat shields
1/2 inch socket for removing and reinstalling the flange nuts.
External lock ring pliers for removal of rings on old exhaust and replacing on new pipes.
7/8 opened end wrench for removal of the 02 sensors and putting on the new pipes.
3/16 allen socket for removing and reinstalling the pulley cover
5/16 allen socket also to remove and reinstalling pulley cover. Needed for installing the new rear bracket back onto the pulley cover. Also needed for removal of the crossover mount.
T30 Torx bit for the removal of the brake rod and reinstallation.
2 x 1/2 inch wrenches for the back bracket nuts and bolts that connect the new pipes to the new bracket. 1/2 inch wrench will also remove mufflers
Let's get started.
Step 1 - Remove any heat shields on stock or existing pipes using a 5/16 socket with 1/4 nut driver.
Step 2 - Remove nuts from exhaust flanges at cylinder heads (front and rear) with 1/2 socket.
Step 3 - Unplug O2 Sensors (front and rear).
Step 4 - Remove muffler mounting bolts with 1/2 wrench, and then the complete exhaust system.
Step 5 - Remove pulley cover using a 3/16 allen socket and a 5/16 allen socket, disconnect brake rod with a T30 Torx head and then you can remove the crossover pipe with a 5/16 allen socket.
Step 6 - Remove retaining rings & anges from stock exhaust using external lock ring pliers.
Step 7 - Re-install on new pipes. (note make sure the flange goes on first before ring and with the lipped indention facing out)
Step 8 - Remove O2 sensors with 7/8 wrench, & re-install on new pipes.
Step 10 - Loosely install pipes on cylinder heads with 1/2 socket & rear nuts and bolts to the new bracket/pipes by hand.
Step 11 - Tighten the nuts on cylinder heads first with 1/2 socket, then tighten the nuts & bolts on rear bracket with 2 x 1/2 in wrenches. By doing this evenly you can achieve the straighter lines on the pipes. Don't forget to check you main rear bracket bolt and tighten as well.
Step 12 - Plug O2 sensors and TAKE A RIDE.
Before
After
Important Exhaust Notes:
• Note: As with any new exhaust, you may need to change carburetor jetting or use of an aftermarket fuel injection control module for peak performance.
• There is no warranty on exhaust pipes and mufflers with regard to any discoloration. Blueing is caused by tuning characteristics, cam timing, carburetor jetting, overheating, etc. and is not caused by defective manufacturing. No refunds on exhaust pipes once motorcycle is started unless there’s a manufacturer’s defect.
• 2015 & Up XL models may need an O2 sensor adaptor to be installed correctly.
• DISCLAIMER: NOT LEGAL FOR SALE OR USE IN CALIFORNIA
For more info, check out a video walk through with Todd.
SHOTGUN EXHAUST PIPES
www.lowbrowcustoms.com
A)
Remove nuts from exhaust flanges at cylinder heads (front & rear).
B) Unplug
O
2
Sensors (front & rear).
C)
Remove muffler munting bolts, & then the complete exhaust system.
D)
Remove pulley cover, disconnect brake rod & then remove the crossover pipe
This tech tip will walk you through installing our new Lowbrow Customs Shotgun Pipes for 1986-2003 XL models. Whether giving you added ground clearance on a scrambler or tracker, or just for high-and-tight style on a rigid or swingarm Sportster, the Shotgun Exhaust Pipes from Lowbrow Customs make quick work of improving your motorcycle's look and sound. Quick and E-Z bolt-on install with the included heavy-duty mounting brackets and hardware.
Lowbrow Customs Shotgun Pipes come in Chrome and Black.
Included in the package and extra info:
- Mounting brackets in your favorite color, black.
- Mounting hardware.
- Requires use of your existing stock exhaust flanges.
- Compatible with Lowbrow Customs Cast Heat Shields.
Tools you will need for the job.
3/8 drive Ratchet
Torque wrench
1/2 inch socket for removing and reinstalling the flange nuts.
External lock ring pliers for removal of rings on old exhaust and replacing on new pipes.
2 x 1/2 inch wrenches for the back bracket nuts and bolts that connect the pipes to the bracket.
1/2 inch also removes stock mufflers.
1/4 drive 5/16 inch socket with 1/4 nut driver for removal of heat shields
9/16 wrenches or sockets for bracket bolts a 3/8 air ratchet optional.
Let's get started!
Step 1 - Remove nuts from exhaust flanges at cylinder heads with 1/2 inch socket (front & rear).
Step 2 - Remove muffler mounting bolts with 1/2 inch socket if needed and then remove the complete exhaust system.
Step 3 - Remove retaining rings & flanges from stock exhaust using external lock ring pliers.
Step 4 - Re-install rings and flanges on new pipes using exhaust using external lock ring pliers. (note make sure the flange goes on first before ring and with the lipped indention facing out.)
Step 5 - Remove top rear motor mount bolts by using 9/16 wrenches or sockets, a 3/8 drive air ratchet is optional.
Step 6 - Install bracket from the kit using the same motor mount bolts and nuts using 9/16 wrenches or sockets. (note, make sure the negative ground wires are still attached to the left side motor mount bolt.)
Step 7 - Loosely install pipes on cylinder heads & rear bracket by hand.
Step 8 - Tighten nuts on cylinder heads first with 1/2 inch socket, then tighten nuts & bolts on rear bracket evenly till desired straight line is met with 2 x 1/2 wrenches.
That's all there is to it! Now go for a ride.
Before
After
Important Exhaust Notes:
• Note: As with any new exhaust, you may need to change carburetor jetting or use of an aftermarket fuel injection control module for peak performance.
• There is no warranty on exhaust pipes and mufflers with regard to any discoloration. Blueing is caused by tuning characteristics, cam timing, carburetor jetting, overheating, etc. and is not caused by defective manufacturing. No refunds on exhaust pipes once motorcycle is started unless there’s a manufacturer’s defect. • DISCLAIMER: NOT LEGAL FOR SALE OR USE IN CALIFORNIA
For more info, check out a video walk through with Todd.
While in sunny California this past December, we decided to stop by our friend JD's shop Flying Monkey Fabrication to hang out for awhile, catch up, and ask him a few questions on camera. See the full story and interview here!
Check out a set of our Flying Monkey Grips inspired by the man himself JD Sansaver. This ws the very first pair ever made!!!! lowbrowcustoms.com/flyingmonkey
Every year Show Class Magazine throws a build off competition called the People’s Champ. Any home garage builder can enter and the people vote via social media to get their favorite builder to Born Free each year.We got a chance to ask Show Class 2015 People's Champ, Jp Rodman a handful a questions a few weeks back in Ventura, CA. We learned a little about this humble artist, about his winning bike, first experiences riding his build, and what he has in store for Born Free 8. Hope you enjoy it as much as we do. Go to lowbrowcustoms.com/jprodman to see the video and full feature.
Dream It, Build It, Ride It... and get Free Shipping on us this Friday-Sunday! Visit lowbrowcustoms.com and make your dreams a reality! Use coupon code: BLOGship at check out time.
(Sorry this promo does not include Hardtails and Frames, lower 48 only.)
We are extremely excited to announce two new styles of grips to the Lowbrow Customs Line up, Knurled and Beck grips. Grips are one of the easiest ways to make your bike stands out from the crowd and changing them out is extremely easy. Check out www.lowbrowcustoms.com/grips for all our styles we carry.
Knurled Grips: The knurled bands encircling this timeless design have been scientifically calculated to allow the proper channeling of sweat from your palms equally well when whiteknuckling around the track or putting along through the desert, all the while providing you with the security and style that one desires from a motorcycle handgrip. In addition, they look the part while your bike is parked, anxiously awaiting your return. Available in 1" and 7/8" for only $19.95 - Get a gnarly grip!
Beck Grips: From the annals of motorcycle history, Beck Grips have been brought back in modern, injection-molded Krayton rubber to fit the make and model motorcycle of your choice. Straight black or marbled, whichever suits your fancy, this narrow profile grip looks right at home on vintage motorcycles as well as custom bikes of all eras and styles. Available in 1" and 7/8' for only $19.95
Here is your chance to snag up some great Giddy Up merchandise along with the chance to win a John Collins' custom Panhead build. By purchasing a shirt, patch, or DVD you will receive one free raffle ticket to be entered in to win this Panhead. You don't have to be present to win and there are no limits to how many shirts, patches, or DVDs you can purchase.
Here are some specs on this John Collins Panhead build. It's a 1964 Harley Panhead, in a wishbone frame that's been windowed. For wheels, it's a star hub laced to an 18 high shouldered rim, and Lowbrow spool laced to a 21 high shouldered aluminum rim. The front end has been shaved and polished, extended 4 inches and sits in a set of custom trees by CMC. The Frisco'd sportster tank has a fully polished stainless bottom, to match the stainless, pegs, sissy bar and taillight mount. Modified exhaust and a custom Old Gold Garage seat. Biltwell taillight, throttle and grips.
For more info or to purchase merchandise and get your free raffle ticket, visit lowbrowcustoms.com/giddyup