Lowbrow Customs' Tsunami Fenders are made to bolt directly to your Harley-Davidson Sportster from 1994 - 2016. However, for those of you wishing to run a Tsunami Fender on your 1982 - 1993 H-D Sportster it can be done with just a little bit of effort. Some tools you will need to complete this simple fab job: scribe or fine sharpie / pencil, drill & drill bits, grinder with a cut-off wheel or a hacksaw and some sand paper.
This 1993 Harley-Davidson Sportster with the modified Tsunami Fender mounted and painted.
Using the 1994-2003 Tsunami Fender on this 1993 Sportster, the only bolt hole that lines up is the center hole that is located under the seat. Once you have removed your stock fender, use the stock nut and bolt from your motorcycle to bolt the Tsunami Fender in place.
Once you have the fender held in place with the center bolt you can see how the fender lines up to the fender struts. Ensuring you have plenty of clearance between the tire and fender, mark where you will need to drill the new mounting holes in your Tsunami Fender. This can be done by scribing the fender with a sharp scribe through the fender strut holes, or a pencil or pen. Remove the fender, center punch the holes (you can do this using a hammer and punch to mark the center of each hole you will be drilling) to ensure your drill bit doesn't wander and drill them to size for your mounting hardware. You can then bolt the fender fully in place.
Once the fender is bolted securely in place, trace along the fender strut to mark where to cut off any excess material on the fender. This can be done with an angle grinder with a cut off wheel, or if need be you can even use a hacksaw to cut the aluminum pretty quickly. You can also trim your fender struts shorter to remove the excess length if you are not using the stock turn signals location, further cleaning up the rear mounting area. Use the sand paper or a sandpaper flap disk on your grinder to smooth out any rough edges and clean up the radius where you trimmed the fender. That's it! Paired with a few other Sportster chopper parts your bike can go from stock to custom in an afternoon and without breaking the bank.
The Rogue Fender from Lowbrow Customs is a heavy-gauge, steel fender that is bolt-on fitment to 1958 - 1984 Harley-Davidson Big Twins using the included chrome plated fender struts and mounting hardware. Instead of the typical choice to run a stock rear fender or a repop stock rear fender, you can now add some custom style to your moto with ease. Whether a mild custom, chopper or race-inspired performance machine, the Rogue Fender looks right at home while standing up to the rigors of the road.
- Bolt-on fitment to '58-'84 H-D Big Twins
- Precision die stamped & CNC laser cut construction
- Heavy 12 gauge raw steel
- Chrome steel fender struts included
Note: Make sure you have proper tire-to-fender clearance. When you are not sitting on the bike you should have about 4" between the tire and fender.
Tools needed for the job
3/8 drive ratchet
1/4 drive ratchet
1/2 inch wrench
9/16 wrench and socket
3/16 allen
15/16 socket Let's Get Started!
Step 1 - Remove stock fender.
Step 2 - Install new fender struts on the inside of the frame with recessed side facing in as shown in picture above.
Step 3 - Install stock 5/8 nylock nuts to both shock studs
Step 4 - Install fine thread 3/8-24 x 1 1/2" bolts with flat washer and lock washer (we suggest to use blue Locktite)
Step 5 - To install the fender, place under the struts on the tire and bring it up instead of forcing it down into the struts.
Step 6 - Install the 6 fasteners from the kit to the remaining fender holes. Note: it's easier to put one nut and bolt on each side first to keep the fender balanced. (Make sure to use blue Locktite)
Before
After
For more help you can watch Todd go step by step via video.
We took a super fast trip down to Texas to check out this year's Giddy Up and have a little fun! The Giddy Up is a vintage chopper show that takes place in New Braunfels, TX at The River Road Icehouse. With 30 plus show bikes on display, tons of great music, food, and people this is a show for everyone to enjoy! Here is a small video recap of the fun Tyler, Julia, Longhair (Jason), Gorgeous Greg, Kat and I had down in Texas, enjoy.
Also for more Giddy Up 2016 coverage you can check out minute to minute coverage of the show at lowbrowcustoms.com/giddyup2016
Lowbrow Customs WX Gas Tanks were influenced by the MoCo's WR factory race bike gas tanks. The beauty of the Lowbrow WX Gas Tanks are that with the included, innovative rear mount they will bolt right up to your stock Big Twin frame 1936 - 1984. Get a custom, narrowed look with a tight gap between the tanks, no fabrication required, these are the perfect tanks for a custom Shovelhead or Panhead. WX Gas Tanks have a capacity of 2.25 gallons and feature both a vent and fuel crossover and accept a 22mm petcock, and accept standard cam-style gas caps.
Tools Needed for this job.
3/8 drive ratchet
1/2 inch socket
Extend long flat head screwdriver
1/2 inch wrench
5/16 Allen or Allen Socket
9/16 wrench
Side cutters
Step 1 - Bolt the rear T-mount to your frame using 9/16 in wrench or socket. Shim between frame tabs with washers as necessary. Do NOT fully tighten yet. (Note: Make sure the T-mount back is pointed up not down)
Step 2 - Insert bolt through top front tab and into cast lug on frame backbone to hold one side of WX Tank in place.
Step 3 - Attach 1/4” inside diameter fuel line to crossover fitting on right tank, install hose clamp and fully tighten. Add an additional hose clamp loosely for the other fitting on the left tank. Push the fuel line into place on vent fitting of left tank when installing right tank. Put flat washer and nylock nut on top tank tab bolt and do not fully tighten.
Step 4 - Align the two rear tabs. The tab on the left tank should be behind of the right tank tab. Attach the WX Tanks with the supplied allen head bolt to the rear end of the T-mount using 5/16 allen wrench or socket.
Step 5 - The front lower tabs on the tanks attach to the stock frame tab on either side. Install and fully tighten the bolt and nylock nut. Fully tighten top through bolt and all bolts to rear T-mount.
Step 6 - Use a length of 1/4” inside diameter fuel line and two hose clamps to connect the fuel crossover fittings. Tighten clamps. Also tighten left tank hose clamp on the upper vent crossover line from Step 3.
Notes: Tanks are pressure tested at the factory, but it is highly recommended you or your painter pressure test it again before painting; it's cheap insurance!
For more help watch Todd walk you through this install.
This tech tip will walk you through installing our new Lowbrow Customs Shotgun Pipes for 2004 and up XL models. Whether giving you added ground clearance on a scrambler or tracker, or just for high-and-tight style on a rigid or swingarm Sportster, the Shotgun Exhaust Pipes from Lowbrow Customs make quick work of improving your motorcycle's look and sound. Quick and E-Z bolt-on install with the included heavy-duty mounting brackets and hardware.
Lowbrow Customs Shotgun Pipes come in Chrome or Black.
Included in the package and extra info:
- Mounting brackets in your favorite color, black
- Mounting hardware
- Requires use of your existing stock exhaust flanges
- Compatible with Lowbrow Customs Cast Heat Shields
- Shotgun Exhaust Pipes include 02 sensor bungs to accept your stock 02 sensors, plug and play! Please note that while this exhaust is bolt-on fitment for 2004 - 2006 XLs, these carbureted bikes will need block-off plugs (not-included) for the 02 sensor threaded bungs.
Tools you will need for the job.
3/8 drive Ratchet
Torque wrench
1/4 drive 5/16 socket with 1/4 nut driver for removal of heat shields
1/2 inch socket for removing and reinstalling the flange nuts.
External lock ring pliers for removal of rings on old exhaust and replacing on new pipes.
7/8 opened end wrench for removal of the 02 sensors and putting on the new pipes.
3/16 allen socket for removing and reinstalling the pulley cover
5/16 allen socket also to remove and reinstalling pulley cover. Needed for installing the new rear bracket back onto the pulley cover. Also needed for removal of the crossover mount.
T30 Torx bit for the removal of the brake rod and reinstallation.
2 x 1/2 inch wrenches for the back bracket nuts and bolts that connect the new pipes to the new bracket. 1/2 inch wrench will also remove mufflers
Let's get started.
Step 1 - Remove any heat shields on stock or existing pipes using a 5/16 socket with 1/4 nut driver.
Step 2 - Remove nuts from exhaust flanges at cylinder heads (front and rear) with 1/2 socket.
Step 3 - Unplug O2 Sensors (front and rear).
Step 4 - Remove muffler mounting bolts with 1/2 wrench, and then the complete exhaust system.
Step 5 - Remove pulley cover using a 3/16 allen socket and a 5/16 allen socket, disconnect brake rod with a T30 Torx head and then you can remove the crossover pipe with a 5/16 allen socket.
Step 6 - Remove retaining rings & anges from stock exhaust using external lock ring pliers.
Step 7 - Re-install on new pipes. (note make sure the flange goes on first before ring and with the lipped indention facing out)
Step 8 - Remove O2 sensors with 7/8 wrench, & re-install on new pipes.
Step 10 - Loosely install pipes on cylinder heads with 1/2 socket & rear nuts and bolts to the new bracket/pipes by hand.
Step 11 - Tighten the nuts on cylinder heads first with 1/2 socket, then tighten the nuts & bolts on rear bracket with 2 x 1/2 in wrenches. By doing this evenly you can achieve the straighter lines on the pipes. Don't forget to check you main rear bracket bolt and tighten as well.
Step 12 - Plug O2 sensors and TAKE A RIDE.
Before
After
Important Exhaust Notes:
• Note: As with any new exhaust, you may need to change carburetor jetting or use of an aftermarket fuel injection control module for peak performance.
• There is no warranty on exhaust pipes and mufflers with regard to any discoloration. Blueing is caused by tuning characteristics, cam timing, carburetor jetting, overheating, etc. and is not caused by defective manufacturing. No refunds on exhaust pipes once motorcycle is started unless there’s a manufacturer’s defect.
• 2015 & Up XL models may need an O2 sensor adaptor to be installed correctly.
• DISCLAIMER: NOT LEGAL FOR SALE OR USE IN CALIFORNIA
For more info, check out a video walk through with Todd.
SHOTGUN EXHAUST PIPES
www.lowbrowcustoms.com
A)
Remove nuts from exhaust flanges at cylinder heads (front & rear).
B) Unplug
O
2
Sensors (front & rear).
C)
Remove muffler munting bolts, & then the complete exhaust system.
D)
Remove pulley cover, disconnect brake rod & then remove the crossover pipe
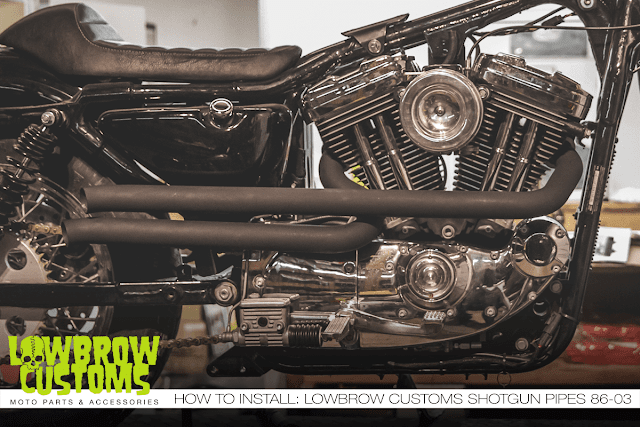
This tech tip will walk you through installing our new Lowbrow Customs Shotgun Pipes for 1986-2003 XL models. Whether giving you added ground clearance on a scrambler or tracker, or just for high-and-tight style on a rigid or swingarm Sportster, the Shotgun Exhaust Pipes from Lowbrow Customs make quick work of improving your motorcycle's look and sound. Quick and E-Z bolt-on install with the included heavy-duty mounting brackets and hardware.
Lowbrow Customs Shotgun Pipes come in Chrome and Black.
Included in the package and extra info:
- Mounting brackets in your favorite color, black.
- Mounting hardware.
- Requires use of your existing stock exhaust flanges.
- Compatible with Lowbrow Customs Cast Heat Shields.
Tools you will need for the job.
3/8 drive Ratchet
Torque wrench
1/2 inch socket for removing and reinstalling the flange nuts.
External lock ring pliers for removal of rings on old exhaust and replacing on new pipes.
2 x 1/2 inch wrenches for the back bracket nuts and bolts that connect the pipes to the bracket.
1/2 inch also removes stock mufflers.
1/4 drive 5/16 inch socket with 1/4 nut driver for removal of heat shields
9/16 wrenches or sockets for bracket bolts a 3/8 air ratchet optional.
Let's get started!
Step 1 - Remove nuts from exhaust flanges at cylinder heads with 1/2 inch socket (front & rear).
Step 2 - Remove muffler mounting bolts with 1/2 inch socket if needed and then remove the complete exhaust system.
Step 3 - Remove retaining rings & flanges from stock exhaust using external lock ring pliers.
Step 4 - Re-install rings and flanges on new pipes using exhaust using external lock ring pliers. (note make sure the flange goes on first before ring and with the lipped indention facing out.)
Step 5 - Remove top rear motor mount bolts by using 9/16 wrenches or sockets, a 3/8 drive air ratchet is optional.
Step 6 - Install bracket from the kit using the same motor mount bolts and nuts using 9/16 wrenches or sockets. (note, make sure the negative ground wires are still attached to the left side motor mount bolt.)
Step 7 - Loosely install pipes on cylinder heads & rear bracket by hand.
Step 8 - Tighten nuts on cylinder heads first with 1/2 inch socket, then tighten nuts & bolts on rear bracket evenly till desired straight line is met with 2 x 1/2 wrenches.
That's all there is to it! Now go for a ride.
Before
After
Important Exhaust Notes:
• Note: As with any new exhaust, you may need to change carburetor jetting or use of an aftermarket fuel injection control module for peak performance.
• There is no warranty on exhaust pipes and mufflers with regard to any discoloration. Blueing is caused by tuning characteristics, cam timing, carburetor jetting, overheating, etc. and is not caused by defective manufacturing. No refunds on exhaust pipes once motorcycle is started unless there’s a manufacturer’s defect. • DISCLAIMER: NOT LEGAL FOR SALE OR USE IN CALIFORNIA
For more info, check out a video walk through with Todd.